
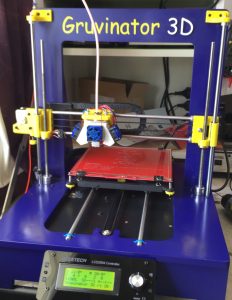
As my latest experiment with 3D printing — and frankly the only one to date worthy of a blog post — I purchased the cheapest Chinese clone, Prusa i3-based printer I could find, took the parts I liked, ditched the rest, and created the “Gruvinator 3D” 3D Printer.
The final result is a mash-up of (mostly) my own Prusa i3 style printed parts and Chinese electronics, motors, and miscellaneous hardware from the kit.
I tried to remember to take photos and short video clips throughout the custom build of roughly three months. Wish there were more, but those I did get helped cobble together this cute little video …
Making of the Gruvinator 3D (3D Printer)
What I kept and what I changed …
The cheap kit set I purchased was the Geeetech version of the open-source Prusa i3, via AliExpress.com. (Seems that specific kit is no longer available. That was quick!) Buying the full kit worked out cheaper than getting just the individual parts I would use. Perhaps they were selling the last few at an extra discount? So anyway, there were quite a few flimsy (plexiglass) rattly or noisy (sheet metal) parts in the kit that got put aside. See below.
Weaker steppers? Actually …
One of the first things I checked was the stepper motor specs. I was initially dismayed to learn that the X, Y, Z motors were rated at around half that of the motors used in every other kit. As it turns out, however, these motors actually appear a better match for the “same old” A4988 stepper drivers. The result is really good micro-stepping performance compared to all previous observations. A pleasant surprise! The motors have no trouble driving everything they need to, despite their lower spec, and owing to that micro-stepping performance boost, they sound smoother than the larger motors we’re used to using. Fascinating stuff!
Geeetech Kit Keepers
Kept these, discarded or stowed everything else — including the entire extruder/stepper motor.
- Stepper motors – X, Y, Z
- X, Y, Z rails (8mm rods)
- GT2560 controller board (RAMPS 1.4 based)
- SD card/ LCD panel
- Power supply (15A, 12V, passive cooling — no fan — quiet. Seems to handle the load.)
- Main socket/switch
- 2 x 40mm fans (1 from their dubious looking extruder, 1 for RAMPS stepper driver cooling.)
- USB cable
- Hot end unblocking tool (1.8mm stainless rod with enlarged handle.)
- Plexiglass and PVC(?) pipe filament reel holder
- MKS v2 PCB bed heater
- Borosilicate glass build platform
- End-stop switches
- Misc. hardware – nuts, bolts, screws.
I never even bothered trying the supplied “MKS v2” extruder. It just didn’t look like a good design at all. Maybe it would have worked OK. I honestly don’t know.
Seems everything Chinese clone-based uses this “MKS v2” tag. Extruders, heated beds, and even some electronics, like the MKS GEN v1.3, used in several of my other cheapie DIY printers.
Additions / Changes
- Prusa compatible Z axis bearing (2 x steel roller bearings on each side)
- X/Y axis – IGUS self-lubricating plastic bearings for more reliable, smooth, and quiet operation
- 3D printed, Prusa i3 compatible, ABS plastic parts
- 3D printed X axis wiring cable chain / organiser
- MDF, iTopie inspired, CNC routed 12mm MDF frame – with amateur spray paint job!
- J-HEAD, E3D v6 Chinese clone hot end (Bowden style)
- MKS v2 cold end extruder, with upgraded stepper motor (stronger than the kit one)
- Bowden tube (PETE 2mm ID)
- Custom hot end cooling assembly, including a quality, quiet running VAPO magnetic bearing hot end cooling fan and two ball bearing print cooling fans. (VAPO fans are sadly not variable in speed. These are noisier but have decent bearings that shouldn’t give out like all the other cheap fans do after a couple of months!)
Final Specifications
Based on my own amateur tests and general observations …
- Print volume: 200 by 185 by 190mm (X, Y, Z)
- Controller board runs my own custom version of Marlin firmware (V1.0.2+ based). Includes a number of bug fixes and enhancements. Nothing I’d call groundbreaking, but important nonetheless.
- SD card/ LCD “Ultipanel” with push-button rotary dial, custom printed mounts with their original plexiglass panel.
- Bowden extruder system for 1.75mm filament, including:
- J-HEAD, E3D v6 Chinese clone hot end
- MKS v2 cold end with upgraded stepper motor
- 0.4mm nozzle
- Recommended printing speed: up to 60mm per second at 0.1 mm layers (recommended)
- Heated bed, with individual height adjustment in four corners. (One “click” ~= 0.06mm)
- Tidy cable chains for X and Y axis wire management
- Standard 8mm stainless steel axis rods (X, Y, Z axis)
- M8 threaded rod for Z axis (has some advantages over ACME versions, especially left/right Z-alignment stability)
- Custom electronic enclosure – all out of sight, below print bed.
- Convenient mains on/off switch at rear
- Geeetech plexiglass/plastic pipe reel holder (holds up to 2 filament reels)
Prints using PLA or ABS …
- PLA
- 70C bed temperature, straight onto glass works very well, so long as the glass is squeaky clean, of course. I use IPA for this — that being isopropyl / rubbing alcohol.
- ABS
- 110-120C bed temperature. Requires “ABS juice” for good glass adhesion, as tested on my other printers.
- The PCB heat bed is frustratingly slow to reach even 110C, at up to 20 minutes — or never if the ambient temperature is below 18º, it seems! If I decide to print ABS frequently on this printer, I’ll need to upgrade the heater or perhaps just cranking the power supply up to 14.2V will be enough. I’ve done that before and everything seemed to handle it fine. This is my first PCB-based heater, though. So, not sure. At 14.2V, the fans run a little faster and the hot end also heats quicker. For now, the Gruvinator does a very fine job with PLA. I’m quite impressed.
Print Samples
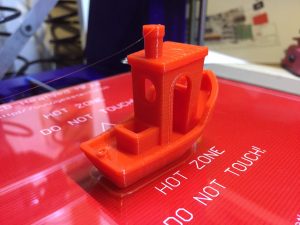
Benchy, at 0.2mm layers, in PLA.
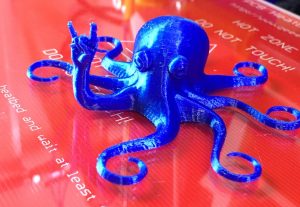
0.1mm layers, in PLA.
Designed in Fusion 360
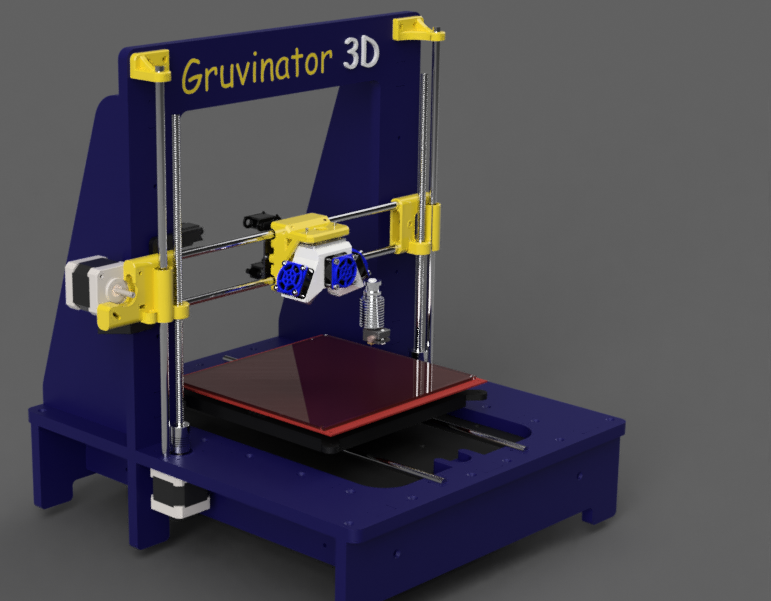
Rendered by Autodesk Fusion 360
Leave a Reply to gruvin Cancel reply